Sunday, September 27, 2009

Fall Stamp A Stack cards

This weekend a fellow demo and I had our Fall Stamp-a-stack together. We used a few beautiful cards that we received as swaps at the Stampin'Up! Convention in August.
The first card was made by Beth Daniels. Here's the supplies:
Stamps: Falling Leaves, Sanded background
Paper: Always Artichoke, Bravo Burgandy, More Mustard, Very Vanilla
Ink: Always Artichoke, Bravo Burgandy, More Mustard
Accessories: Vanilla 1/4" grosgrain, Bravo Burgandy 1/4" grosgrain, 1" circle punch, 1 1/4" circle punch, spritzer tool.

The second card was made by Jaceynth Gauthier. Here's the supply list:

Stamps: Lovely as a Tree, Season of Friendship

Paper: Chocolate Chip, Really Rust, Ruby Red, Old Olive, Whisper White

Ink: Chocolate Chip, More Mustard, Really Rust, Ruby Red, Old Olive

Accessories: Blender pen, Versamark, Irridescent Ice.

The third card was inspired by Gretchen Barron, but altered by Stacey Buzbee, my co host.


Stamps: Wandering Words

Paper: Always Artichoke, Elegant Eggplant, Sahara Sand, Whisper White, More Mustard, Soft Suede, Dusty Durango

Ink(markers): Soft Suede, More Mustard, Elegant Eggplant, Ruby Red, Always Artichoke

Accessories: Autumn Traditions DSP, Scallop Edge punch, Sizzix Leaves die, Button Sizzlet, Linen thread, Crimper


Last but not least is a card inspired by local fellow demo Josie. I changed the background of the card and made it a little brighter.
Stamps: Holiday Best- Level 1 Hostess set
Paper: Kraft, Pumpkin Pie, Chocolate Chip, Very Vanilla
Ink: Pumpkin Pie, Old Olive, Chocolate Chip
Accessories: Modern Label punch, Wide Oval punch, Slot punch, 5/8" chocolate chip grosgrain, Perfect details Texturz plate.
I bet you are wondering where my last card is... well, if you go to my September 14th post you will find my Halloween card there.
Hope you have found some inspiration here! Have a great week.
~Charlotte

Friday, September 18, 2009

Surprise!

I got a wonderful surprise from a friend today. She told me another gal had my card featured on her website that she got from me as a Stampin'Up! Convention swap. I was so excited that I inspired another demo to case (copy and steal everything) off my card. LOL! Then I felt like a total dork for not posting it on my own website first! So here is on of the cards that I swapped in August at Convention.
Here is a picture of me with my card at the submission boards ;)


SUPPLIES
Stamps: Wings of Friendship
Cardstock: Old Olive, Rich Razzleberry, Whisper White
Ink: Old Olive, Rich Razzleberry, Orchid Opulence Accessories: Cottage Wall designer series paper, Sizzix Scallop Circle #2, Sizzix Flourish Texturz plate, Bigz Lattice Die, Square Fire Rhinestone Brads
I hope you have a great weekend! I have alot of work to do in preparation for my Stamp A Stack next weekend. There are a few spots still available! I will take your reservation until Thursday September 24th.
~Charlotte

Monday, September 14, 2009

September demo meeting samples

At last nights demo meeting we did a swap with other Colorado Springs demos. This is a variation of the card I made to swap. Here's what I used:
Stamps: Halloween Frights and Haunting Hill jumbo wheel.
Paper: Basic Grey, Basic Black, Pumpkin Pie, So Saffron.
Ink: Basic Black, Pumpkin Pie, Silver Encore Ink.
Other: Sizzix Scallop #2 die (for the clouds), Modern Label punch, Cutter Kit, Dimensionals, sponges.


Now this little cutie is one of the little Build-a-bear dolls I made. My son's teacher, Mrs. Jordan loves panda bears, so I had to make one just for her. Anyways, I took it up to the meeting tonight to share with the other ladies.
Hope you have a great day! I hope to post more exclusive Build-a-Bear Stampin'Up! samples soon. If you are interested in taking the upcoming class with these little cuties, let me know.
Charlotte

Saturday, September 5, 2009

Finally a new post!

I made this card for my son's second teacher he has this school year. I know you are asking, second teacher? Yes, the school district shifted the kids around in his grade. So after two weeks of school they pulled 4-5 kids out of each class to form a new one. So after the kids started to get settled in with the 2nd teacher, about two weeks, they moved a teacher over from another school to teach his class. It sure is alot of change for a 1st grader to adjust to. But he seems to being doing fine so far. I know if they think they are pulling him for a new class next year that there will be one hot mama up there making sure he doesn't get moved again.
So I used several items on this card, let me list them for you.
Stamps: Great Friend (butterflies), Inspired by Nature (grass), Flight of the Butterfly (sentiment)
Ink: Barely Banana, Bliss Blue, Perfect Plum, Orchid Opulence (stamped off), Old Olive
Other: Stampin'Up! Little Leaves sizzlit die, brayer, sponging, masking.
Hope you enjoy!
Charlotte

Saturday, July 18, 2009

I have some really talented friends and wanted to share with you some of their work. The first card uses the Fifth Avenue Floral stamp set and the new In Color Bahama Breeze. The technique showcased on this card is Crayon Resist. I am working on a tutorial for it now that I will share with you soon. By the way, Stacey Buzbee is the creator of this card.


The next card I want to share with you is from Peggy Davide. She used the new Razzle Dazzle stamp set and colored the image in with markers, and stamped it. Now she has also showcased the Big Shot Top Note exclusive to Stampin'Up! She sent the die thru the Big Shot and then rotated it 180 degrees and ran it through again. It is a really great effect that us in the stamping world have be playing with lately.


This third card was done by my upline Kimberly VanDiepen. She used alot of wonderful layers on this card that make it a real WOW card. The stamp set is From the Crypt. She has also used the Big Shot for the textured background and the Lattice Big Shot die that is exclusive to Stampin'Up! as well. (this is the black cutout piece). Lastly she tied it up with Basic Gray taffeta ribbon.


Last, but certainly not least is this beautiful, yet simple card made by another Stampin' friend, Christy Schroeger. She stamped the ginko branch from the Kind & Caring Thoughts level 3 hostess stamp set with Rich Razzleberry, sprinked on some Dazzling Diamonds glitter and there you have it.
Well, I hope you enjoyed a little bit of what I have to share today. I am busy working on my swaps for Convention in Salt Lake City in a few weeks. I am excited to go again. Have a great weekend and check back soon!
~Charlotte


Wednesday, June 10, 2009

Technique Tuesday ~ Shaving Cream Technique


Supplies:
Reinker
Shaving Cream (not gel)
Paper plate
Paper towels
Toothpick
Whisper White paper 4 ¼ x 5 ½


1. Shake can of shaving cream and squirt onto paper plate. You want a layer about an inch thick and larger than your piece of paper you are going to use.


2. Drop several single dots of reinker on the shaving cream layer.


3. Take a toothpick and run it through, making a pattern. On mine, I ran it through like I would do a marble cake.


4. Gently place you paper into it and tap lightly.
5. Pull your paper up and lay on a paper towel.


6. Use another paper towel to wipe off excess shaving cream. Try to wipe once and in one direction.
Let dry for a few minutes.
Now it is ready for a card.


Here’s my example:
I hope you enjoy this easy, but impressive technique.
Have a great week!
~Charlotte

Wednesday, June 3, 2009

Technique Tuesday... um a little late

I decided I want to start doing new techniques on my blog to share with you each Tuesday. I know it is not Tuesday, but things have been a little hectic with my husband getting ready to deploy, so please forgive me.
I call this Layered Embossing. I saw it on someone's blog and when I find it again I will give credit where it is due, until then I hope you enjoy.
Instructions for this card:
1. Stamp main image with Stazon ink on Whisper White paper cut 4" square. Color in with lightest color, I used Barely Banana. Put a shadow on your petals with medium color, I used So Saffron. Then color entire image in with Versamark marker. Next clear emboss image.
2. Stamp leaves in Versamark pad, then classic ink pad, I used Old Olive, and stamp around rose image. (hint: you don't need to mask rose image, you can wipe it with a Kleenex or sponge). Clear emboss (you don't have to Versamark the leaves, because you did it each time you stamped them… cool, I know). Color in the leaves, darker on one side than the other. I used Always Artichoke and Mellow Moss. Color with Versamark marker and Clear emboss again.
3. Now sponge with Chocolate Chip around the image. Stamp leaves with Chocolate chip ink, this creates your shadow and color leaves in with Close to Cocoa marker. Sponge around outside of paper with Black Ink.
4. Stamp Baroque Motif with Chocolate Chip ink around 5 ¼" square. Sponge around outside of paper with Creamy Caramel ink, then do left side with Tempting Turquoise. Sponge around entire outside with Black ink.
5. Punch 4 black corners out with the Photo Corner punch. Use your piercing tool to put in the holes for your silver brads. Adhere entire image to a 6" square and place in your technique book.
~Charlotte

Tuesday, June 2, 2009

The Last Chance List is out!

The Last Chance List is out! Download your own copy of the lists when you click on the link to the right!
~Charlotte

Monday, May 25, 2009

and the Winner is... Corinna!

The winner of my blog candy for my Cards for Heroes post is... Corinna! She was also one of the participants in the blog hop. You can check out her post at http://www.myscrapbooklife.com/.

Thank you all for the wonderful comments on my card. Each time I checked the comments I was surprised by how many and how sweet they all were.

~Charlotte

Friday, May 22, 2009

Memorial Day Bloghop 2009

Happy Memorial Day weekend! This is the weekend we celebrate all of our military men and women who have fought and continue to fight for our freedom. I have been married to my Air Force soldier now for 9 years. My job as a mother is going to be alot harder in the next year as my husband prepares for a year long deployment. He was not forced to take this job, he signed up for it. So when you enjoy time with your family this Memorial Day weekend, please keep our soldiers in your prayers and remember that freedom isn't free.

I hope you enjoy my card I made especially for this weekend. So here is what I used: Cardstock: Close to Cocoa, Kiwi Kiss, Whisper White, Summer Sun; Ink: Chocolate Chip, Close to Cocoa, Kiwi Kiss, Always Artichoke, Ruby Red, Not Quite Navy, Apricot Appeal, Black Stazon; Stamps: The Free & the Brave, Canvas Background (retired); Accessories: Sizzix Ribbon Sizzlet, Sizzix Top Note Die (exclusive to Stampin'Up!) Key Tag punch, Pewter Jumbo eyelets, linen thread.
So I signed up for the Memorial Day Bloghop, hosted by Cards for Heroes, http://cardsforheroes.org/ . There are over 100 bloggers signed up for this hop, so you will have the opportunity to check out all of their wonderfully creative patriotic ideas in honor of Memorial Day. You will also have option of leaving comments on each blog. Some of the bloggers are giving away Blog Candy. Blog candy is a free give away item you can win if you leave a comment under their Memorial Day Bloghop blog entry. I happen to be giving away some blog candy myself.
This wonderfully patriotic Stampin'Up! "Land That I Love" stamp set can be yours if you leave a comment below ;) I will use one of those internet sites that picks random numbers, so good luck!
Now that you have enjoyed my post, here is the next one on the stop, check out Suz blog at: http://craftysuz.blogspot.com
If you get stuck on a blog that doesn't link, please go back to http://cardsforheroes.org and you should be able to click on the list to keep going.
Have a great day!
~Charlotte


Wednesday, April 29, 2009

Happy May Day!!!

So, only Wednesday I had the pleasure of tagging along on my son's kindergarten classes field trip. We went to Bear Creek Nature Center here in Colorado. It was a really hot day and I got sunburned on the back of my legs. Anyways, the kids had a blast and my gift for the teacher for Teacher Appreciation next week is coming early. We are flying out to Hawaii on Saturday for a week with Fred on his last TDY there. I know... poor us. I am so excited to go and catch up with some old friends who are stationed there at Hickam AFB on Oahu.


The inspiration for my bouquet of kids came from Renée Caffee, a demo in Virginia. I don't have her blog address, but if someone out there has it, I would be happy to link it to her. My son's teacher is so sweet, I think she will love it!


Have a great day!

Charlotte


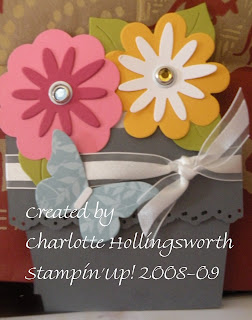
Pot of Flowers

Well, it has been a long time. My good friend and sideline, Christy Schroeger, aka mamaschroeg.blogspot.com sent me some beautiful RAK (random acts of kindness) for commenting on one of her blog post.

So go check out her blog and leave a comment on mine as well under this post and I will send you some RAK of your own. I will do the first 5 only. Good luck! I hope to hear from you soon.

So here is my version of her card that I did at a workshop recently. Hope you enjoy the Spring inspiration ;)


Have a great day!

Charlotte

Friday, March 27, 2009

Sale A Bration Stamp A Stack cards

I had my Sale A Bration Stamp A Stack last weekend and wanted to share the cards with you.
The first card uses: So Saffron, Certainly Celery and Bashful Blue cardstock. The DSP is called Delicate Dots (Sale A Bration). Stamp sets are Wagon Full of Fun (Spring Occasions Mini catalog) with the duck and "Lucky Duck!" and Polka Dot Punches (Sale A Bration) using the scallop shape.
The second card uses: Baja Breeze and Whisper White cardstock. The sentiment is from Fifth Ave Flowers stamp set, stamped in Baja Breeze. I used the Manhattan Flower Textured Impressions die, which is like a folder you slide your cardstock into, and sent it thru my Big Shot machine. The Eyelet Border punch was used along with our new Organza ribbon in Whisper White.

My Third card uses: Pink Pirouette and Certainly Celery cardstock, Delicate Dots DSP (Sale A Brations) and Certainly Celery ribbon (SAB ribbon bundle). The stamps are from the Wagon Full of Fun stamp set. I also used the Stampin' Up Backgrounds I texturz plate and inked it up with Pretty in Pink Ink before running it through the Big Shot.

My 4th card: I used Really Rust, Sage Shadow and Very Vanilla cardstock, Sage Shadow ribbon, and Really Rust & Sage Shadow ink. The stamp sets used are Botanical Blooms (Sale A Bration) and Only Ovals "fabulous FRIEND" (in the Spring Occasions mini catalog). The scallop oval punch is also NEW and in the Spring mini.

My 5th and final card: uses Red Riding Hood, Pink Pirouette, Old Olive and Whisper White cardstock. Stamp sets I used are: Polka Dot Punches (SAB) and All Occasions. Punches used: 5 petal flower, 1/2" circle & Photo corner punches. I also used the piercing tool and a build a brad.
I hope you can get some inspiration for all of these wonderful stamp sets and accessories.
~Charlotte

Party bags made super simple!

I made 5 gift bags for my sorority sisters tea party. I had some Afternoon Tea Designer series paper from last Spring that I thought would be beautiful for the occasion. I bought a 6 pack of white bags at Michaels for about $3 (w/ my 40% off coupon). The bags measured 10x13, so I cut off the extra 2" of width of our 12x12 paper, punched one side of it with the Eyelet Border punch and flipped it over to the coordinating side and stuck it down with our Red Sticky Strip, double-sided adhesive. Then I used the retired coordinating card stock and cranked out some Top Notes with my Big Shot machine and stamped with "a little Something for you" stamp out of the Yummy Sale A Bration stamp set. I used my stamp a ma jig to line up the words just right on the Top Notes and punched a hole in one end using the 1/2" circle punch and tied them on using some extra ribbon I had on hand. Our guests for the Tea Party all received a bag with a beautiful, fruit teapot embroidered hand towel.


This is how you make a beautiful bag for around $2.00 each!
~Charlotte


Sympathy cards

I have had some family members pass away in the last two months. I was trying to make a sympathy card to send to my relatives that were simple.


I don't know that I was satisfied with any of them because I have never made a sympathy card. My uncle Lester died in February. He was early 70's and had many health issues later in life. One of my best memories of him was when he would put a small coffin on the front sidewalk of his and my aunt's house on Halloween and scare trick or treaters walking by. He would also put a pumpkin on the porch and it would talk to. He was a really good man and could get a smile out of you no matter what.
My aunt Joyce, one of my father's oldest sisters died of brain cancer in March. When she got to the point where there was nothing the hospital and doctors could do anymore, she went home and died about a week later. Her twin sons carried her fragile little body around like a rag doll.
I respected both of them who died. I am lucky to have good people in my life.
~Charlotte

Trendy Trees Landscape

I actually got the Trendy Trees stamp set from another demonstrator who had an extra set from her class. I didn't think I would like it as much as I did, but I have a customer who loved it in the catalog. So I have seen these clouds on people cards and finally figured out how to do them. I used the stamp a ma jig to place the tree leaves and trunks on the "hill" correctly. The sun is made from the scallop stamp in the Polka Dot Punches Sale a bration catalog.
SALE A BRATION ENDS MARCH 31ST! When you spend $50 in retail you can choose from 4 different stamp sets, a ribbon bundle or a special Designer Series paper pack! Email me, call me, don't miss out on your chance for something FREE!
Hope you enjoy!
~Charlotte

Congrats for Wendy!


One of me and my husband's dear friends is pregnant with her first baby. I was so excited that I had to make her a congrats card! I used So Saffron CS for the card base, Sale a bration DSP and ribbon, the new Eyelet Border punch from Stampin' Up! The little ducks came from a level 3 hostess set called Goody-Goody Gumdrops.
~ Charlotte

St. Patty's Day Treats

I am a little late posting these pictures, but I had to share. I made 24 of these goodie bags for my son's kindergarten class. They are filled with chocolate coins. The class is learning about them right now, so it was perfect timing for a treat like this ;)

So Paige is looking adorable in her St. Patty's dress. She didn't want to wear it at first, but I told her that the kids would pinch her if she didn't wear green!


Wednesday, March 11, 2009

Shamrock Flip Flops

I saw a post last week on someone else's blog where they made fancy flip flops out of the new butterfly sizzix die. So I thought since St. Patty's is coming up I would make some special flip flops for my little girl. I searched all over town for a clover die and ended up purchasing these adorable foam shamrocks at Micheals. I used my crop o dile to punch holes in the clear straps and put the shamrocks on with Stampin' Up Ice Brads and Stampin' Up gold brads. Then I took some green ribbon and hot glued that on the inside of the strap so the brads wouldn't poke through and hurt my little girl's feet.
I did make another pair with butterflies for myself. I haven't taken photos of those yet. I will post when I have done that. Have a great day! Charlotte


Sorority Tea


The first pic here is an invite to a social put on by my sorority chapter to another one in town. I used the Bella background with Close to Cocoa ink on So Saffron cardstock. I also used the large tag punch and the medium and small ovals to make the handle on the teacups and saucers.


Tuesday, February 24, 2009

Val's bday card


My wonderful friend Valerie had a birthday last week so I had to make her a pink hatter card. I inked up my Stampin'Up! texture plates for the background. I love the effect! Also used the scallop #2 die, and coluzzle circle for this card. I think the stamp set is Hattitude.
~ Charlotte

Shamrock projects for you to do without St. Patty's stampsets

So here are a few shamrock projects w/out using shamrock stamps.
My card is made with Kiwi Kiss & Whisper White cardstock. I stamped the "clover leaves" with the Sale A Bration Polka Dots heart. I used versamark and white embossing powder. Then popped out those images with the new Full Heart punch. I stamped the 5 petal flower image from the samp stamp set and punched out the middle with the 1/2" circle and adhered it to a build a brad. The lucky definition came from Define Your Life stamp set. I finished it up with the Kiwi Kiss ribbon.

The second project here was a share from another demo. I am planning to make a bunch of these for my son's kindergarten class.

This little bag was made with the Bigz Top Note Die. The stamp set is Love You Much. The coordinating punch I used for the little hearts is called Heart to Heart punch. I also punched out the scallop with our fabulous Scallop punch and used my Crop-o-dile to punch out the scallops. I tied it all together with our organza ribbon in Whisper White.
Have a great day! The weather is warm here, I hope it is nice in your neck of the woods as well.
Charlotte

Cheep Talk with a Good Friend

I have to give a shout out to my girl Val! She had a workshop for me and we made 7 sets of these adorable projects with the Cheep Talk & Good Friend stamp sets!
The first project is a hanging box. This project originated at Leadership this year. I don't have a downline to qualify to go, but my upline brought the projects back to share with all her girls up here in Colorado Springs. Thanks Kimberly!
The designer paper used in all these projects is Good Morning Sunshine. The birds are from the Onboard So Tweet chipboard kit. There are enough in the package to make 8 of these purses and more! Scroll down to see what other chipboard pieces we used from this kit.

This tweet little card was another project we did. I really love how it turned out. After putting the above box together, we really needed something quick and cute!
The owl below comes from the Onboard So Tweet chipboard. There are also eight of him in the pack. We took our Versamark pads and stamped the scallop stamp from the Polka Dots Sale A Bration set and stamped him all over the owl, then we took our chalk pastels and a q-tip and colored him. The effect is just striking!
On the last card I wanted to do something with the Sale A Bration ribbon and the wonderful Good Morning Sunshine DSP. I really love how this card turned out especially.
I hope you enjoy these projects as much as we did making them on Sunday! Have a great afternoon.
Charlotte :)


Sunday, February 15, 2009

What's your sign?

I went to my upline's meeting last week and we were challenged to bring our own signs to share with other demos what you can make with your wonderful Stampin'Up! products.
My sister-in-law is pregnant with her first baby and they don't know if it is a boy or girl yet, so I decided to try creating a "neutral" looking baby sign for the baby out of the Sale A Bration paper pack and ribbon bundle. I also used the Bigz Scallop #2 die, some Jumbo Eyelets, and the Sizzix Serif Essentials Alphabet.
Valentine's Day was yesterday, so I made my lovely "L-O-V-E" sign with paper from the Candy Lane pack, Bigz Scallop #2, jumbo eyelets, Serif Essentials alpha, and the Bird w/ Leaves & Flower Die that I ran thru my Big Shot with chipboard to make it more durable. I used a half pearl and took a stone from one of the brads in the Pretties kit and used a small glue dot to stick them on the bird. Lastly I applied Irridecent Ice to the bird and scratched some off with my finger and sponged around the bird with Riding Hood Red ink. I really love how it turned out!
~Charlotte